Dynamics Interactive Dashboards – Workaround to Default to “All” Records
Dynamics Interactive Dashboards – Workaround to Default to “All” Records
Background on the Issue
I wrote a previous blog singing the praises of interactive dashboards in Dynamics 365. I have always been a fan of interactive dashboards. However, I’ve been frustrated with the limitations of the default Time Frame. For each interactive dashboard, Dynamics prompts you to choose a Filter Date and a default Time Frame.
The Filter Date can be any of the date fields in the featured Filter Entity.
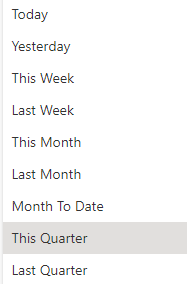
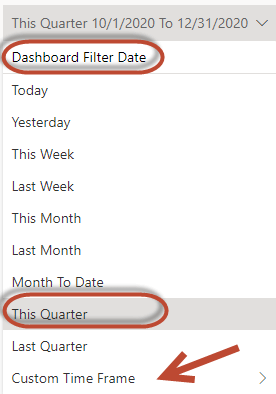
The default Time Frame can be any of the Time Frames listed below.
Often, users want the interactive dashboard to open with an overview of all the targeted entity data records. This cannot be easily configured using a combination of the available Filter Dates and default Time Frame selections. Even though the user has the option to select Custom Time Frame, the Custom Time Frame cannot be configured as the default Time Frame. But, I will walk you through the steps to create a workaround to this problem.
What is the Workaround?
The idea is to configure the interactive dashboard using a Filter Date that is always set to “today” and a default Time Frame set to “Today” or “This Quarter”. Both of these Time Frames will work. This combination will result in the interactive dashboard displaying all entity records by default – no need to update the Custom Time Frame every time the dashboard is opened!
To accomplish this, I implemented the following steps in our Dynamics 365 demo environment:
Create a custom “Date Only” field for your entity called something like Dashboard Filter Date.
Set up a daily recurring Power Automate Flow, scheduled to run in the very early morning, to update the Dashboard Filter Date with the current date.
Select the Dashboard Filter Date to be the Filter Date for the interactive dashboard and “This Quarter” (or “Today”) to be the default Time Frame.
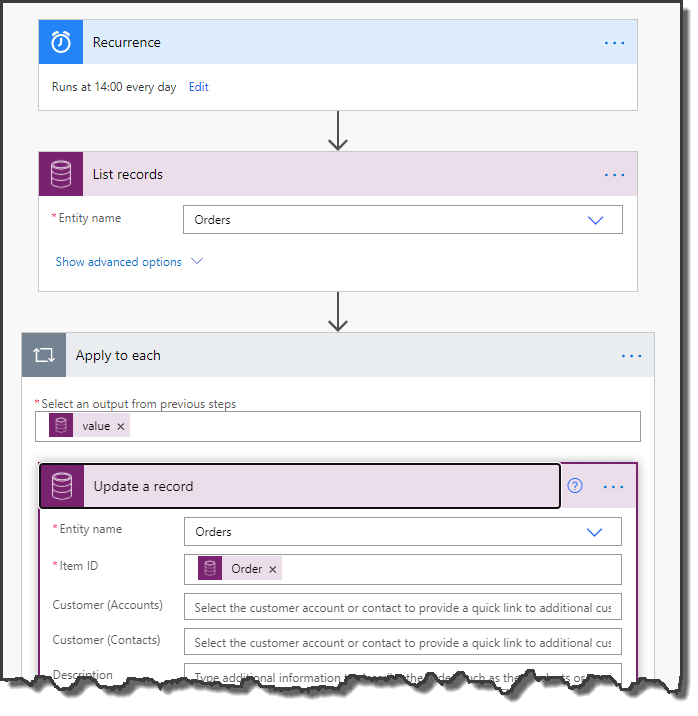
The Power Automate Process
I don’t have a lot experience with Power Automate. But, with the help of few blogs, this Power Automate Flow was not difficult to create.
The first step is to set up the details of the recurrence. For testing purposes, I chose every day at 2:00 PM. When I’m ready to move this to production, I will change the time to 2:00 AM.
Then, in the “List records” action, you need to identify the entity that you want to target. In this case, it is Orders.
Next, choose the “Apply to each” control to loop through all of the Order records.
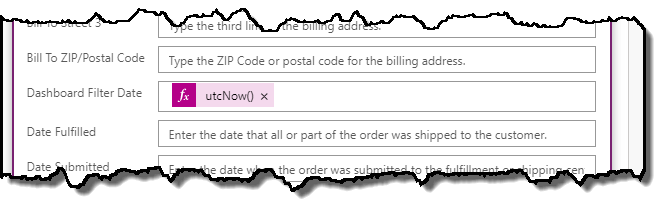
Lastly, “Update a record” – identify the Order Item ID field – update the Dashboard Filter Date with the utcNow() expression.
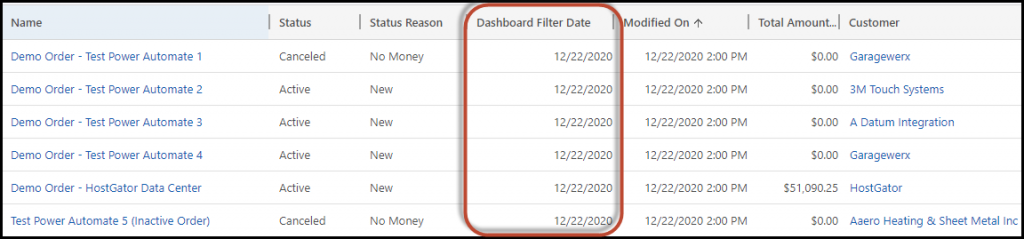
On a daily basis, this Flow will update the Dashboard Filter Date to the current date on all the Order records as shown below:
The Interactive Dashboard
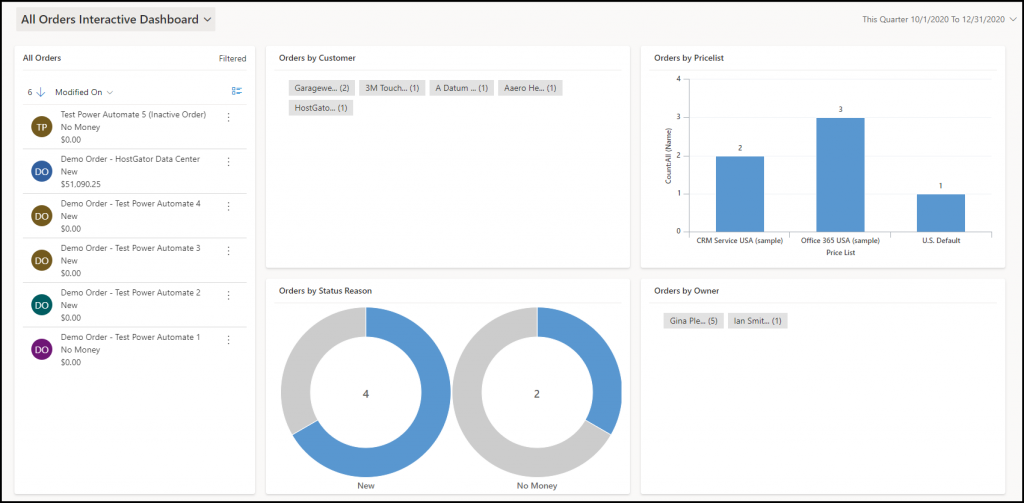
As previously stated, my goal was to create an interactive dashboard that displays all of the targeted entity records by default. This can now be achieved by selecting the Dashboard Filter Date and “This Quarter” in the dashboard configuration.
“All” records includes both active and inactive records. In the Power Automate, the “List records” action does not have any filters. As a result, the Dashboard Filter Dates on inactive Order records are updated as well. This is ideal for this dashboard that features the “All Orders” view. There is an Orders by Status Reason chart that the user can use to filter on the active and/or inactive records.
What are the Caveats?
The Power Automate process will also update the Modified On date. Typically, the Modified On date is not a meaningful date to users, but this should be noted.
Depending on the targeted entity, an “All” records dashboard may run into issues with record limits. Dashboard charts, and charts in general, are limited to 50,000 records.
Check your Power Automate plan license to be aware of any cost to your organization to run the recurring Flow.
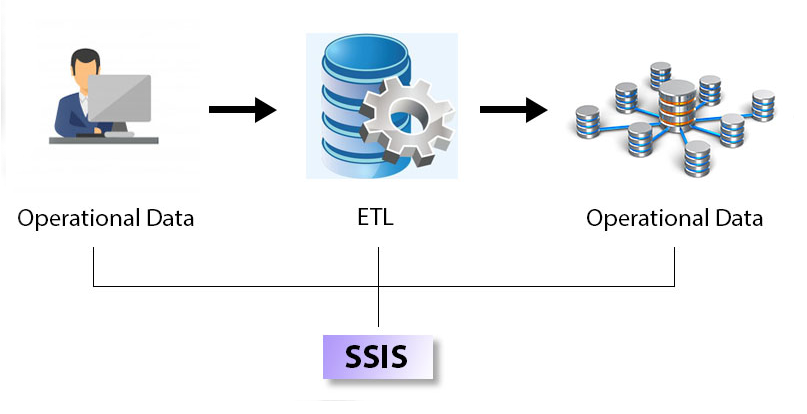
I do a lot of data migrations, moving data from one system to another. Usually as part of a migration from a legacy system to Dynamics 365 CRM. Oftentimes I’m
In the digital age, the security of your business’s data is paramount. One of the most basic yet crucial aspects of this security is the use of passwords. This article
For small business owners, managing IT is a challenge. Requiring multi-factor authentication (MFA) is a great first step to protect against cyber-attacks. But be aware that legacy authentication methods don't
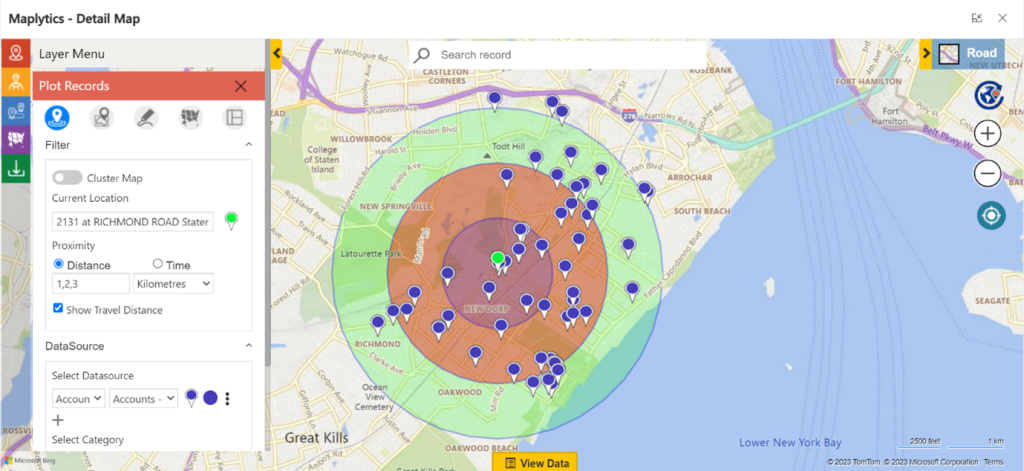
Maplytics is the de facto leader in Dynamics 365 mapping integration. By geocoding CRM records, the affordable mapping add-in provides radius search, territory management, auto-scheduling, and route optimization.
Working with small and medium-sized businesses (SMBs) in the fields of construction and landscaping, we’ve noticed that these types of organizations face unique hurdles when it comes to adopting sales
Having worked with numerous small and medium-sized businesses (SMBs) with a focus on sales, marketing and customer service, we’ve witnessed recurring challenges that impede these organizations’ efforts to acquire, retain,
If your organization is experiencing a lack of sales pipeline, an increase in missed opportunities, and declining conversions in your sales and marketing process, you’re far from alone. Many small
Dynamics 365 8.2 to 9.1 Upgrade During the process of upgrading from Dynamics 8.2 to 9.1 we encountered plugins that worked in 8.2 but caused errors when trying to browse
Change Root Business Unit Name in Dynamics 365 CRM It is possible to change the root Business Unit Name in Dynamics 365 CRM using SSIS. We will get the GUID
Reduce the risk of browsing the internet or working on a corporate-owned laptop on a public WiFi connection With more employees working remotely, and now back to traveling for business
Hello. Many thanks for this article, albeit a few years old now, on a Dashboard Workaround to display “All Records”. The constraint of the default time frames for filtering data in the interactive dashboard is something that Microsoft should look at.
The idea of the Dashboard Filter Date works fine, that is very handy. However I didn’t adopt the flow addition (mainly down to potential follow on costs for flow repetitions), but I used a calculated field (in my case in the Contact record), to display “Today’s” date. This seems to have worked fine also.
How to select the “Dashboard Filter Date” to be the Filter By for the interactive dashboard?
Do we have to set a field/column property for it to appear under the Filter By dropdown list when creating the interactive dashboard?
When you configure the dashboard, the Filter By drop down will display all entity fields that are defined as date fields. So, you can select any of the date fields. Every field that is defined as a date field will be listed as an option for the Filter By.


4 Comments
Hello. Many thanks for this article, albeit a few years old now, on a Dashboard Workaround to display “All Records”. The constraint of the default time frames for filtering data in the interactive dashboard is something that Microsoft should look at.
The idea of the Dashboard Filter Date works fine, that is very handy. However I didn’t adopt the flow addition (mainly down to potential follow on costs for flow repetitions), but I used a calculated field (in my case in the Contact record), to display “Today’s” date. This seems to have worked fine also.
Once again, many thanks for the idea.
Chris
Hello, Chris,
I like your idea even better – thank you for sharing that! I will definitely use that solution in the future.
Gina
Hi Gina,
How to select the “Dashboard Filter Date” to be the Filter By for the interactive dashboard?
Do we have to set a field/column property for it to appear under the Filter By dropdown list when creating the interactive dashboard?
Hi Eva,
When you configure the dashboard, the Filter By drop down will display all entity fields that are defined as date fields. So, you can select any of the date fields. Every field that is defined as a date field will be listed as an option for the Filter By.
Gina