Create Multiple Phone Calls in Dynamics 365

Create Multiple Phone Calls in Dynamics 365 I’m not a Business Developer, but I do understand that the job of a Business Developer is not an easy one. Their priority is to help their companies acquire new clients and sell additional products or services to existing ones. This role is a critical one for any business that wants to grow and diversify its customer base. Cold calling and the recording of those cold calls are usually the worst part of the day of a Business Developer. We were tasked with trying to eliminate some of the pain out of this process as part of a Dynamics 365 CRM upgrade project for one of our clients. We found a quick way to create multiple phone calls in Dynamics 365 that our client found very easy to use; in addition to closing those same phone calls when they left voicemails. Our Clients Our client imports “prospect” Accounts and their associated Contacts from various third party sources. Each Business Developer is responsible for finding their own list of prospects to call on. New management was in support of making the Phone Call activity and the outcome of those Phone Calls a mandatory entry into Dynamics by the Business Developers – no more spreadsheets! The Suggestion We suggested that they follow the Best Practice of saving Contacts with parent Accounts and recording not only Phone Calls, but all Activities, at the Contact level. To facilitate the creation of the Phone Call records, we created an On Demand workflow. The idea is to search for your prospect Contacts that you want to target on a particular day. Some Advanced Find training gives the Business Developers the skills they need to create a list of the appropriate Contacts based on the various Account and Contact categorization values. They can select all of the Contacts in the search results and run the On Demand workflow. The workflow creates a Phone Call record with a Due date = “today” for each selected Contact from the Advanced Find. “Call to Contact Name at Account Name” prepopulates the Subject line. A previous customization copies the Business Phone and Mobile Phone from the Contact record to the Phone Call record. Custom View of My Open Phone Calls To provide a list of all the Phone Call records that were created by the workflow, we created a custom view of My Open Phone Calls. Using the out of the box Due filter of “Today or earlier” and then sorting by the Due Date in descending value order allows the Business Developer to easily access the list of phone calls they need to make for that day. The Phone Call record was modified with the addition of a custom date field called Create Follow Up Phone Call with Following Due Date. This gives the Business Developer the ability to update the Phone Call with details of the conversation and schedule a follow up Phone Call at the same time. Another custom workflow runs on the change in this field and automatically creates a new Phone Call record with a Subject line of “Follow up with Contact Name at Account Name on Due Date”. Follow Up Phone Call Unfortunately, the reality for Business Developers is that a lot of Phone Calls result in having to leave a voice mail. To facilitate this process, we suggested that from the My Open Phone Call view, they select those Phone Call records and use the Bulk Edit to update the Left Voice Mail checkbox. At the same time they can update the Create Follow Up Phone Call with Following Due Date field and have follow up Phone Calls created for all of their Contacts with one click of the “Change” button. Hopefully they’ll have better luck with that follow up phone call. By engaging in conversation and starting a new relationship with a potential customer, it may result in a big “Win” for their business!
Importing Contacts into Dynamics 365
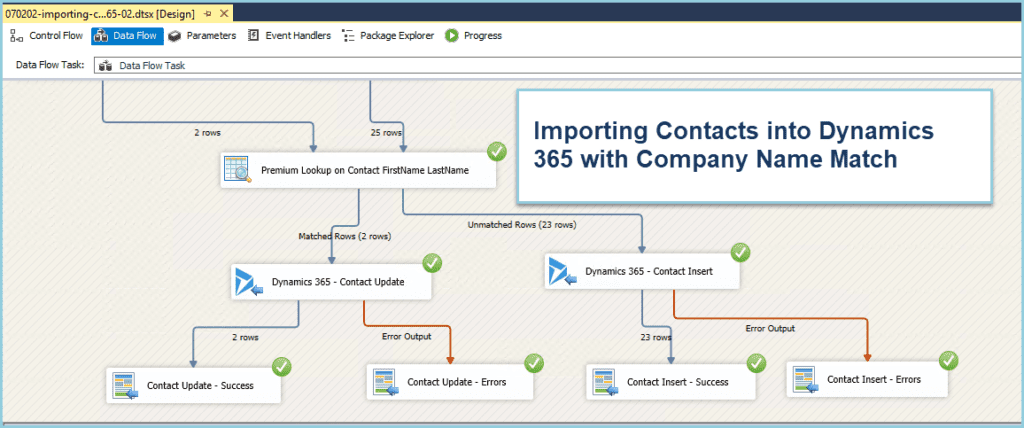
How to import contacts into Dynamics 365 CRM with company name match using KingswaySoft SSIS.
How to Bulk Merge Duplicate Accounts and Contacts in Dynamics 365 Customer Engagement
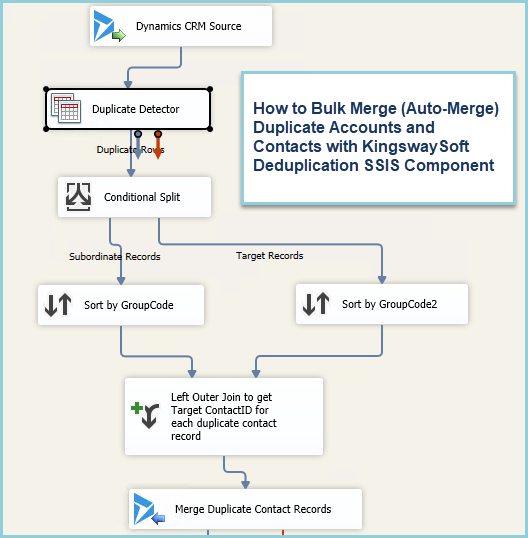
How to merge duplicate accounts and contacts in Dynamics 365 CRM with KingswaySoft SSIS.
Create Sample Data for Dynamics 365 CE with KingswaySoft SSIS Data Spawner
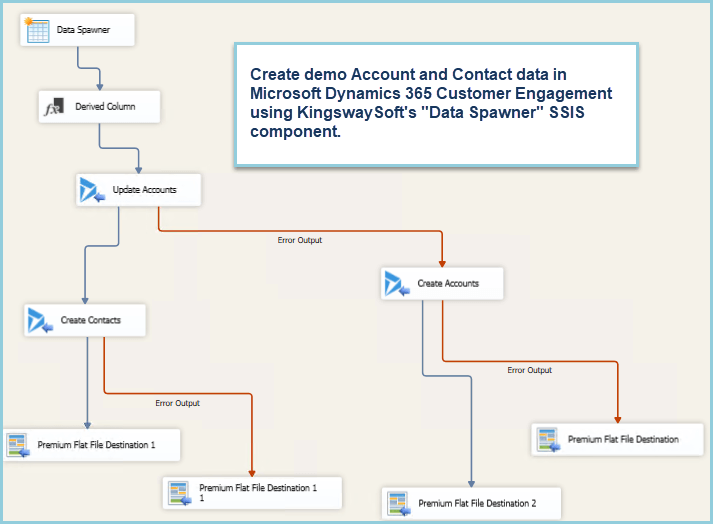
Creating Sample Data for Dynamics 365 CRM with the KingswaySoft SSIS Data Spawner SSIS Component
Remove Business Process Flows in Dynamics 365
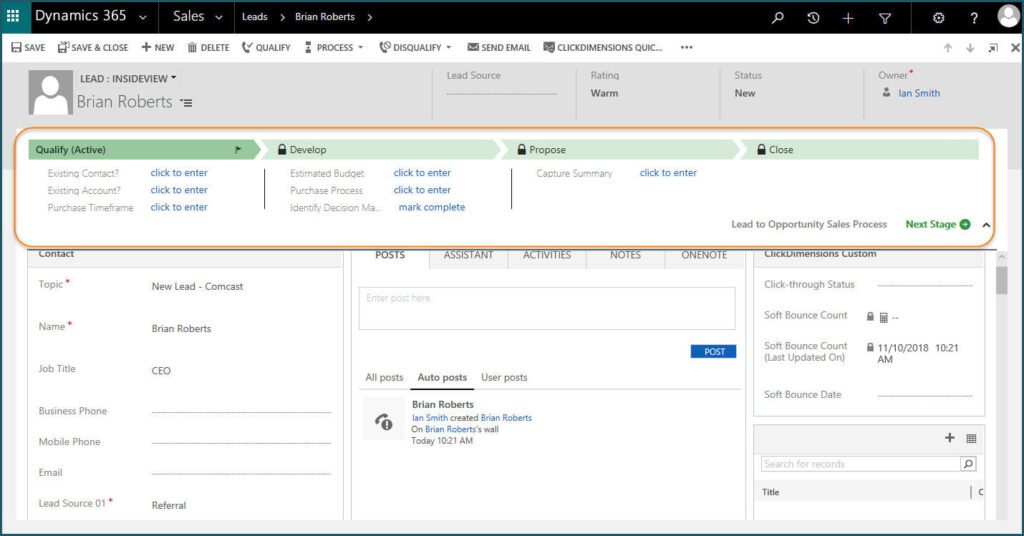
Remove Business Process Flows in Dynamics 365 8.2 and Above With version 8.2 of Dynamics 365 Customer Engagement (CRM), Business Process Flows became an entity unto themselves. There’s are lots of articles out there on how to remove Business Process Flows from existing Lead or Opportunity records. The main reason people may want to remove the Business Process Flows is that they have a really simple process and don’t want to sacrifice the screen real estate at the top of the form for a Business Process Flow that they don’t use. And, from what I’ve found browsing around at the various blog articles on how to remove the Business Process Flows, they don’t address one of the most obvious scenarios. Let’s say you have been using CRM for a while, and you have several thousand Lead records, and they are all using the “out-of-the-box” Lead to Opportunity Business Process Flow. The instructions I’ve seen say to copy the Business Process Flow to make a “backup copy” in case you ever need it again. Then, the instructions say to delete the original Business Process Flow that is associated with the Lead records. Well, this doesn’t work if the Business Process Flow is part of a managed solution, which the out-of-the-box Business Process Flows are. Also, this is an “all or nothing approach.” Suppose I want to keep the Lead-to-Opportunity Business Process Flows active for Open Opportunities, but remove for Open Leads? Another solution is to write some JavaScript to hide the Business Process Flow. But this is also an all-or-nothing approach, unless you want to code the JavaScript with conditional logic, to hide certain Business Process Flows, but not others. Going back a minute, the idea of deleting the Business Process Flow entity itself means that you’re going to delete all the records for that entity. Again, great, if that’s what you want to do, and the entity is not part of a managed solution, which are stubborn to delete. Not great if you want to keep some of the Business Process Flow records and remove others. So, let’s say you tried deactivating the Business Process Flow in question; the one that’s associated with most, if not all, of your Leads. Now you still have the Business Process Flow taking up the real estate on your form, and you now also have a warning message that the business process flow for this record has been deactivated. So, I found the simplest way for me to remove these Business Process Flow records from some or all of your Lead records is to delete the individual Business Process Flow records, themselves. Note, I didn’t say delete the Business Process Flow entity (the “Lead to Opportunity Business Process Flow entity”) – but the Lead-to-Opportunity BPF records. How do you do this? Where can you find these records to delete the ones you want to delete? At first, I reverted to my data analyst mode, and fired-up my SSIS environment to do the work, then I realized we can just use Advanced Find in CRM directly. Just do an Advanced Find of the Business Process Flow of interest; in this case the “Lead to Opportunity Business Process Flow” entity. Then you can apply a filter, and say you want to delete just the “Lead to Opportunity Business Process Flow” records associated with a certain Open Lead, or some Open Leads, or All Leads, or both all Leads and all Opportunities — just apply the Advanced Filter accordingly. Then, you can add some columns to the results view of the Advanced Find from either the Lead or the Opportunity. When you’re done filtering, sorting, and analyzing to determine the records you want to delete – then just highlight the records and hit the delete button. Pretty simple, after all, I would have to say.
How to Get Marketing List Member Details
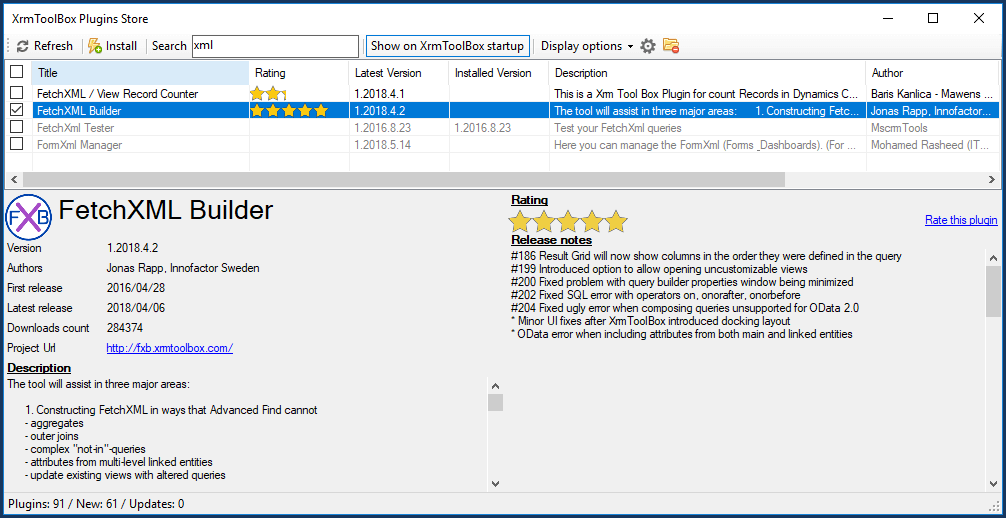
Getting at Marketing List Member Details in Dynamics CRM Its not obvious how to get at Marketing List Member Details in CRM; in fact, there isn’t an out-of-the-box way to get basic details about the Leads or Contacts on your Marketing Lists. Here’s a solution that involves creating a custom FetchXML query, that you can build with the FetchXML Builder tool You can then use the query by running it directly within the FetchXML Builder; or use the query to build a custom FetchXML SSRS Report. Marketing Lists in Dynamics 365 can be static or dynamic. I’ve only tested this with static marketing lists as of now, so I’ll hold off on commenting whether this will also work for dynamic-type marketing lists. But, to solve the common problem of not being able to get at Marketing List Member Details in Dynamics 365, we can build a Fetch XML query. Many-to-Many Relationship (a.k.a., N:N Relationship) There’s a many-to-many relationship between Marketing Lists and Marketing List Members (Leads or Contacts). There is no obvious way to see a view of the details of your marketing list members. For example, say you wanted to know the city and state of all the members of a given marketing list. The city and state data is on the contact record, and the contact record is on the Marketing List, so why can’t you just create a view of the contacts, with the respective city and state using Advanced Find? The problem is that the relationship between Marketing Lists and Marketing List Members (e.g., Contacts) is a many-to-many relationship, and so the Advanced Find won’t find this relationship by default (out-of-the-box configuration with no customizations). There are work-around solutions to create this custom N:N relationship, which would require some configuration. But if you want to get at the data without creating a customized Advanced Find view, then the alternative is to create a custom FetchXML query. FetchXML Builder with the XRMToolbox The XRMToolbox is a must-have tool for CRM Consultants, and sometimes even CRM Power Users. It’s a free download that includes a tool called the FetchXML Builder. Once, you get started with the FetchXML Builder, you can build a query that looks like this, and you’ll be able to query any Marketing List to see Lead or Contact details, like city and state of contacts on your marketing list, as we discussed in our example. [xml] <fetch> <entity name=”list”> <attribute name=”listname” /> <attribute name=”listid” alias=”List” /> <filter type=”and”> <condition attribute=”listname” operator=”eq” value=”Marketing-List-Name-here” /> </filter> <link-entity name=”listmember” from=”listid” to=”listid” intersect=”true”> <attribute name=”entitytype” /> <attribute name=”listmemberid” /> <attribute name=”entityid” /> <link-entity name=”contact” from=”contactid” to=”entityid” alias=”Contact”> <attribute name=”emailaddress1″ /> <attribute name=”owneridname” /> <attribute name=”owneridtype” /> <attribute name=”ownerid” /> <link-entity name=”team” from=”teamid” to=”owningteam” alias=”Team”> <attribute name=”name” /> </link-entity> </link-entity> </link-entity> </entity> </fetch> [/xml]
Dynamics 365 for Sales v9 Demo
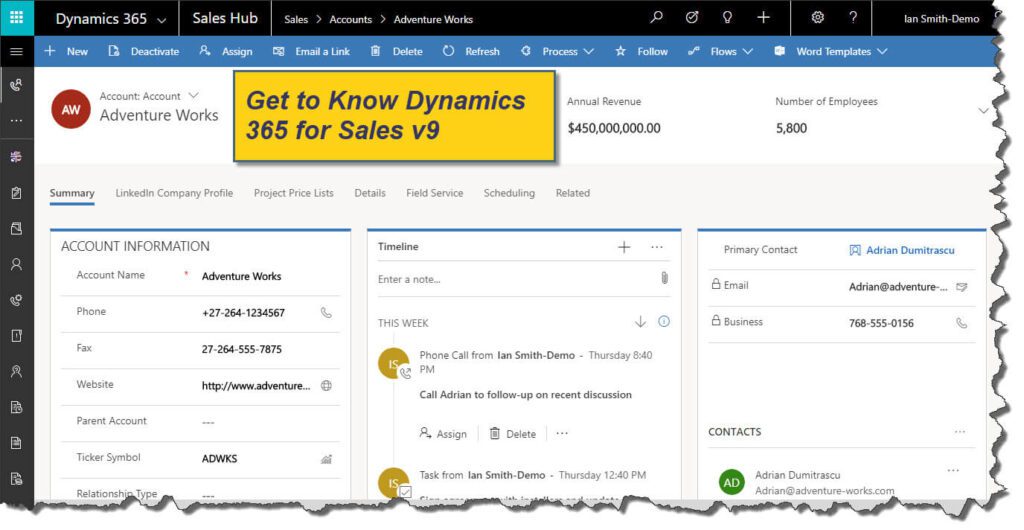
What’s new in Dynamics 365 Sales v9 including sales processes, Insights by InsideView, MS Office integration, and Power BI to help sales people be more productive and drive sales.
Customer Service Case Management Email-to-Case
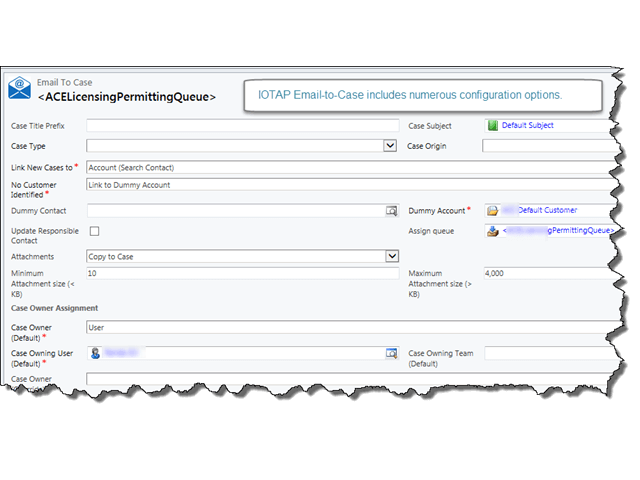
Email-to-Case Saves Customer Service Time and Money Email-to-Case for Customer Service Case Management provides an automated process for initially creating customer service tickets from emails and provides for rapid communications, with external acknowledgements and internal notifications, and elimination of several manual data entry steps to keep the cases moving through the queue to resolution. Zap Objects Partner SyncraTec has partnered with Zap Objects, a Microsoft Dynamics Independent Software Vendor (ISV) with offices in Reston, VA, to provide the Email-to-Case solution for a nationwide propane distributor headquartered in the Philadelphia area. Nationwide Propane Distribution Operations Two customer service groups at the organization took advantage of the solution. We brought in approximately 100,000 customer ship to addresses, which are updated weekly, to facilitate the process by automatically populating address information to the case. Incoming emails addressed to specific queues (email addresses) are automatically converted to cases in CRM. The body text of the email is copied-over to the case description, attachments are also uploaded from the email to the case. An email acknowledgement is immediately sent back to the customer to let them know their case has been received and will be processed shortly. Also, internal notifications are sent to the case owner. Further correspondence back-and-forth between the Customer Service Reps and the customer are tracked within the same case in CRM. Augmenting the Process with Automation The new system is an improvement over the old way of doing things where emails were manually converted to cases and users had to also manually populate several fields, and reply back to the initial email. Though the emails were tracked in CRM, there was a delay in the initial response to the customer, and cases were often missed. We instituted that the customers would always send in their customer service requests to specific queues (email addresses) dependent upon the type of issue. If the email was recognized in the system, then the Parent Customer was automatically populated, and the case could further be routed to the appropriate rep. Further customization was provided with JavaScript that automatically populated several other fields when the customer’s ship to address was selected. The list of all ship to addresses is imported from the financial system and refreshed on a regular basis. The client has been delighted by the new process, which has reduced the number of manual processes, eliminated duplicate data entry, and avoids the embarrassment of missed cases. Customer satisfaction is also increased as they get quicker updates and issue resolutions.
How to Disable Data Validation Messages in Excel
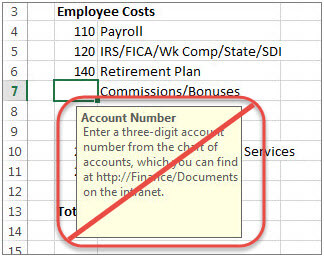
How to disable annoying data validation messages in Excel after exporting to spreadsheet from Dynamics 365 CRM.
Set SPN Records for Dynamics CRM SSRS Configuration
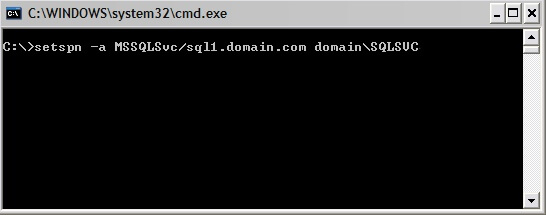
SPN Records for Dynamics CRM SSRS You may need to Set SPN Records for Dynamics CRM SSRS Configuration after installing or upgrading Microsoft Dynamics CRM 2011, Dynamics CRM 2013, or Dynamics CRM 2015, on-premises. These few settings may actually need to be configured manually. Setting SPN records can be a little tricky at first, until you get the hang of listing out the existing records and figuring out the format of the records you actually need. The associated SSRS errors can also look pretty bad to start with but with a little post-installation configuration work, setting the SPN Records for Dynamics CRM SSRS Configuration could be the magic you need to be up-and-running in a few minutes. First, lets go to the SQL Server Reporting Services Server machine, to check whether you have the two SPN records that are required. Log onto the SQL Server machine with an account that has Domain Admin permissions. Open an administrative Command Prompt Type setspn -l domainusername of the service account that runs SQL Server Reporting Server Service. This will list the current SPN’s associated with the account. If you do not pull back two results you have another command to type. You need the following two SPN records to show up after the last command: http/servername http/fqdn of the server example server.domainname.local or what you use for your local domain. If they’re not there, you’ll have to add them. The commands two commands to add the SPN records are: setspn -a http/server domainServiceAccountName setspn -a http/server.domain.local domainServiceAccountName Again run the first command “setspn -l domainusername” to list the changes you have made. Then move over to the CRM Server. There you will have another little tweak. Open the IIS manager on the CRM server. Click on the CRM website. On the right side: Click Configuration Editor Expand system.Webserver Expand Security Expand Authentication Click Windows authentication Change the useAppPoolCredentials from False to True. Save your changes Perform an iisreset You’re all set and now your CRM reports should be back up-and-running.