
Set SPN Records for Dynamics CRM SSRS Configuration
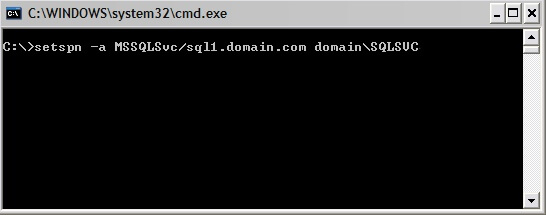
SPN Records for Dynamics CRM SSRS You may need to Set SPN Records for Dynamics CRM SSRS Configuration after installing or upgrading Microsoft Dynamics CRM 2011, Dynamics CRM 2013, or Dynamics CRM 2015, on-premises. These few settings may actually need to be configured manually. Setting SPN records can be a little tricky at first, until you get the hang of listing out the existing records and figuring out the format of the records you actually need. The associated SSRS errors can also look pretty bad to start with but with a little post-installation configuration work, setting the SPN Records for Dynamics CRM SSRS Configuration could be the magic you need to be up-and-running in a few minutes. First, lets go to the SQL Server Reporting Services Server machine, to check whether you have the two SPN records that are required. Log onto the SQL Server machine with an account that has Domain Admin permissions. Open an administrative Command Prompt Type setspn -l domainusername of the service account that runs SQL Server Reporting Server Service. This will list the current SPN’s associated with the account. If you do not pull back two results you have another command to type. You need the following two SPN records to show up after the last command: http/servername http/fqdn of the server example server.domainname.local or what you use for your local domain. If they’re not there, you’ll have to add them. The commands two commands to add the SPN records are: setspn -a http/server domainServiceAccountName setspn -a http/server.domain.local domainServiceAccountName Again run the first command “setspn -l domainusername” to list the changes you have made. Then move over to the CRM Server. There you will have another little tweak. Open the IIS manager on the CRM server. Click on the CRM website. On the right side: Click Configuration Editor Expand system.Webserver Expand Security Expand Authentication Click Windows authentication Change the useAppPoolCredentials from False to True. Save your changes Perform an iisreset You’re all set and now your CRM reports should be back up-and-running.
T-SQL for Picklist Values in CRM 2011
How to Write T-SQL for Picklist Values in Microsoft Dynamics CRM Getting at the Picklist Values (a.k.a., Option Sets) is not easy. It’s not hard either. As you know, the picklist values are stored in the entity as numerical values, not the character-based descriptive values. But how to get at the descriptive values that are useful to we humans? Here’s a sample query giving you T-SQL for Picklist Values. This example is for Leads (ObjectTypeCode 4), and a custom picklist value for County (sync_county). The key table you want to get access to is the StringMap table. But you have to put a couple of strategic filters in place to make it work. SELECT LeadBase.CompanyName, LeadBase.FirstName, LeadBase.LastName, LeadExtensionBase.Sync_County, StringMap.AttributeName, StringMap.Value FROM LeadBase INNER JOIN LeadExtensionBase ON LeadBase.LeadId = LeadExtensionBase.LeadId INNER JOIN StringMap ON LeadExtensionBase.Sync_County = StringMap.AttributeValue WHERE (StringMap.ObjectTypeCode = 4) AND (StringMap.AttributeName = N’sync_county’)
This message has not been submitted for delivery
Ever get this warning message for e-mails you’ve sent in CRM? If this option is not set correctly, e-mail is not sent and a warning message “This message has not been submitted for delivery” appears. In the Navigation Pane, click Settings, click Administration, and then click Users.– OR – In the Navigation Pane, click Settings, click Business Management, and then click Queues. Open the user or queue you want to modify. Under E-mail Access Configuration, select how e-mail will be accessed for incoming and outgoing mail. None E-mail will not be sent or received. Forward Mailbox E-mail will be forwarded from another e-mail address. Microsoft Dynamics CRM for Outlook E-mail is sent and received with Microsoft Dynamics CRM for Outlook . E-mail Router E-mail is sent and received with the Microsoft Dynamics CRM E-mail Router. If this item is selected, the Allow credentials check box is displayed. To require that credentials be entered, select the check box. Click Save or Save and Close. Notes If you have selected an e-mail option, verify that there is a valid e-mail address in the E-mail box. If you select Microsoft Dynamics CRM for Outlook as your e-mail option, you must also allow Microsoft Dynamics CRM to send mail through Microsoft Dynamics CRM for Outlook .