

Unsecured company data can cost millions in lost research, regulatory fines, or litigation settlements, but protecting your information shouldn’t make it harder for workers to get their jobs done.
Getting started with Office 365 Email Encryption is easier than you think. A lot of organizations already have license to the service; so why not empower workers to protect data.
Office 365 Email Encryption (a.k.a., Office 365 Message Encryption) is an online service that’s built on Microsoft Azure Rights Management. With Azure Rights Management set up for an organization, administrators can enable message encryption by defining transport rules that determine the conditions for encryption. A rule can require the encryption of all messages addressed to a specific recipient or just emails with a key word in the subject line, for example.
When an Exchange Online user sends an email message that matches an encryption rule, the message is sent out with an HTML attachment. A recipient opens the HTML attachment in the email message, recognizes a familiar brand if that’s present, and follows the embedded instructions to sign in, open, and read the encrypted message on the Office 365 Message Encryption portal. The sign-in process helps ensure that only intended recipients can view encrypted messages.
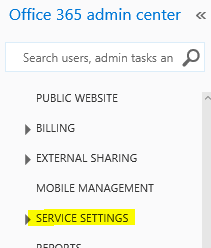
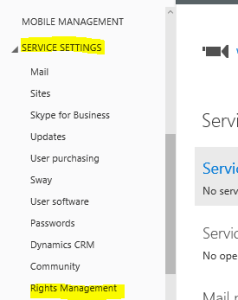
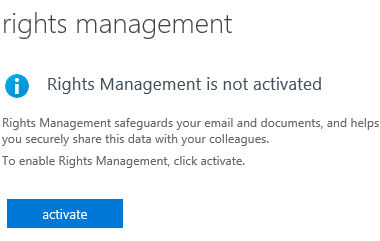
To activate Rights Management go to the office 365 admin portal. Then click on Service Settings on the left then click Rights Management

Open and connect to Office 365 using PowerShell. Right-click and run PowerShell as an administrator on your windows desktop / laptop. Set your PowerShell to security to ‘remotesigned’ (Set-ExecutionPolicy RemoteSigned) and type y for yes.
Get Credential(s)
$UserCredential = Get-Credential
Sign in with an Office 365 User Account that is a Global Admin and is a member of the following Security Groups in office 365:
- Compliance Management
- Organization Management
- Records Management
Next command is:
$Session = New-PSSession -ConfigurationName Microsoft.Exchange -ConnectionUri https://outlook.office365.com/powershell-liveid/ -Credential $UserCredential -Authentication Basic -AllowRedirection
Import PowerShell Session
Import-PSSession $Session
Now you are connected to office 365 through PowerShell!
Configures the RMS Online key sharing location
Set-IRMConfiguration -RMSOnlineKeySharingLocation “https://sp-rms.na.aadrm.com/TenantManagement/ServicePartner.svc”
Import the Trusted Publishing Domain from RMS Online
Import-RMSTrustedPublishingDomain -RMSOnline -name “RMS Online”
The result should look like this:

Check your Configuration
To verify that you have successfully configured IRM in Exchange Online to use Azure Rights Management service run this command:
Test-IRMConfiguration –RMSOnline
You will see information about your Office 365 tennent and at the bottom you should see
OVERALL RESULT: PASS
Now you will need to use PowerShell to enable IRM in Exchange Online:
Set-IRMConfiguration -InternalLicensingEnabled $true
Now that the Rights Management is on and configured for Office 365 online you will need to create a mail flow rule to make it work for your users. You must sign out of the Office 365 portal and then sign back in for the changes to show up.
Go to your Office 365 Admin Center again and navigate to the Exchange Admin area. On the new page go to mail flow from the menu selection. Click on the plus sign to and select create a new rule… from the dropdown. Halfway down the page click the more options link before giving the rule a name.
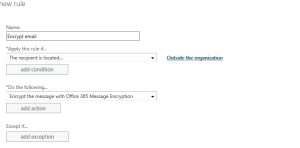
Give the rule a name
In the (apply this rule if…) dropdown, choose: The recipient… then move over to the arrow and select is external/internal. In the select recipient location popup box select Outside the Organization and click OK
In the (Do the following) dropdown choose: Modify the message security… then move over to the arrow and select Apply Office 365 Message Encryption.
Click add a condition and choose The subject or body… then move over to the arrow, select subject includes any of these words in the specify words or phrases box, and add the word you want to type in the subject of the email to encrypt to email; like “Sensitive,” or “Confidential.”
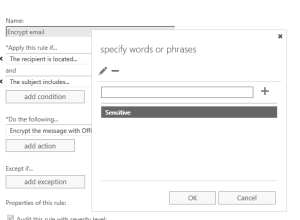
Now scroll down and make sure that under Choose a mode for this rule: is set to ENFORCE and there is a checkbox in the Stop Processing more rules box as shown below.

Save the rule
Once the rule is saved, if the priority of the rule is not zero, double-click to rule and make sure the priority is set to zero.
You’re Done, start using the service to secure your data. In addition to preventing negative brand exposure and litigation costs which could apply to any industry, you should have lots of good reasons for doing so:
Healthcare:
- Control access to patient data
- Expedite patient care with mobile devices (e.g., bring your own device – see Enterprise Mobility Suite)
- Avoid HIPAA fines
Financial:
- Control access to client data
- Lock down devices used by mobile workers (see Enterprise Mobility Suite)
- Avoid regulatory fines and penalties
Manufacturing / Construction:
- Protect product designs, formulas, patents, and other IP
- Secure RFP’s, contracts, and sales communications
- Lock down mobile devices used by traveling executives (see Enterprise Mobility Suite)


No comment yet, add your voice below!